Setup
Set up your PuriFi
There is more than one way to connect PuriFi, and each comes with its own advantages. Pick the one that suits your home — we recommend inline mode whenever possible. Everything here is from the owner’s manual, which you can read in full.
Before you start
Everything you need is in the box, apart from the phone in your pocket. Setup takes a few minutes.
In the box
- PuriFi device — the unit with the small screen on the front.
- Power supply — 27 W USB-C.
- USB-to-Ethernet cable — USB on one end, Ethernet on the other. This is PuriFi’s second network connection.
- Ethernet cable — one end is right-angled, to sit flat against the device.
You will also need
A phone, iPhone or Android, with Bluetooth switched on and the PuriFi app installed.


Three ways to connect it
Choose your setup
Almost everyone should use the inline mode. It protects every device in the house and needs no changes to your router.
| Device Visibility | Max Protection | No double NAT | |
|---|---|---|---|
| Inline | Yes, with router configuration | Yes | Yes, with router configuration |
| Sidecar | Yes | No | Yes |
- *
- Requires router configuration.
More info
- Device Visibility.
- Per-device profiles and rules, and a real list of what is on your network instead of one line saying “router”.
- Max Protection.
- Some smart TVs, streaming sticks and IoT gadgets ignore your router and look names up themselves. Inline they are caught anyway, because everything passes through PuriFi.
- No double NAT.
- Sitting between your modem and your router adds a second layer of address translation. Most people never notice; Plex, remote play, port forwarding and self-hosted game servers can.
Inline
- Plug and play
- Compatible with all networks
- Max 1 Gbps
- Pros
- Plug and play, best protection
- Cons
- Double NAT, no per-device configurations
Both have a fix: put your router into access point mode. See how below.
Set this up
PuriFi sits between your modem and your router and checks every request your home makes before it leaves the house. Because it sits in the middle, it protects everything — phones, laptops, televisions, speakers, game consoles, doorbells — without you installing anything on them.
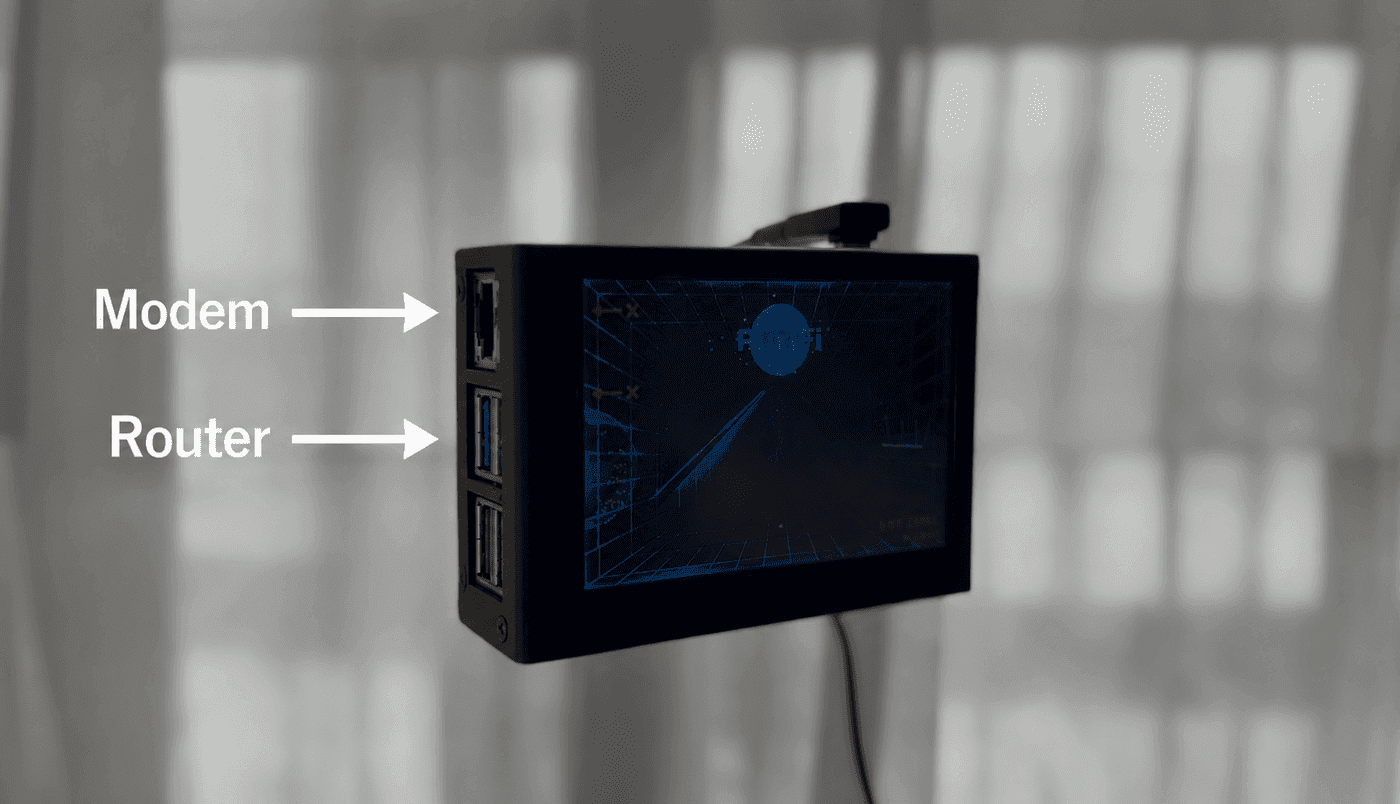
Step 1 — Put PuriFi between your modem and your router
- Unplug the Ethernet cable that runs from your modem to your router — take it out at both ends and put it aside. You will not need it.
- Take the Ethernet cable from the box. Plug one end into your modem, and the other into PuriFi’s built-in Ethernet port.
- Take the USB-to-Ethernet cable from the box. Plug the USB end into one of PuriFi’s USB ports.
- Plug its Ethernet end into your router’s internet port — the one you just emptied. It is nearly always a different colour from the rest and labelled Internet or WAN.
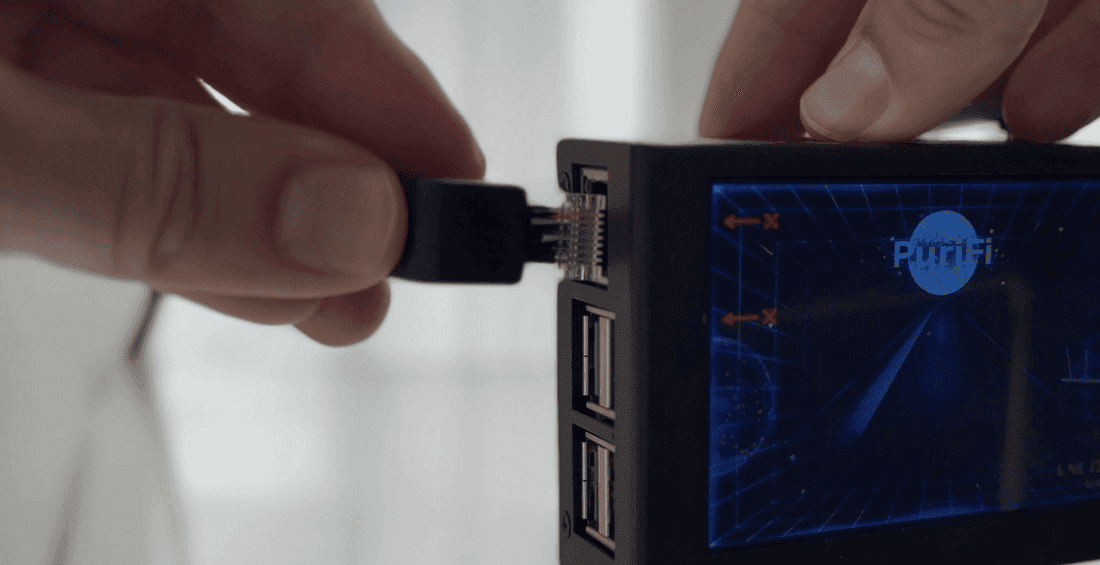
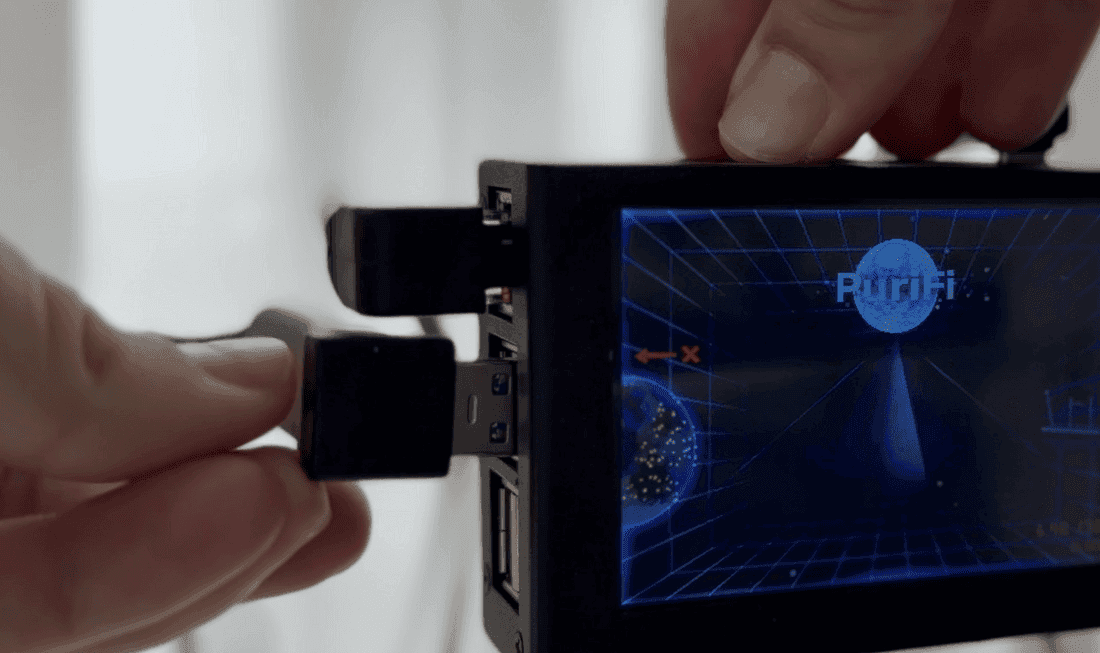
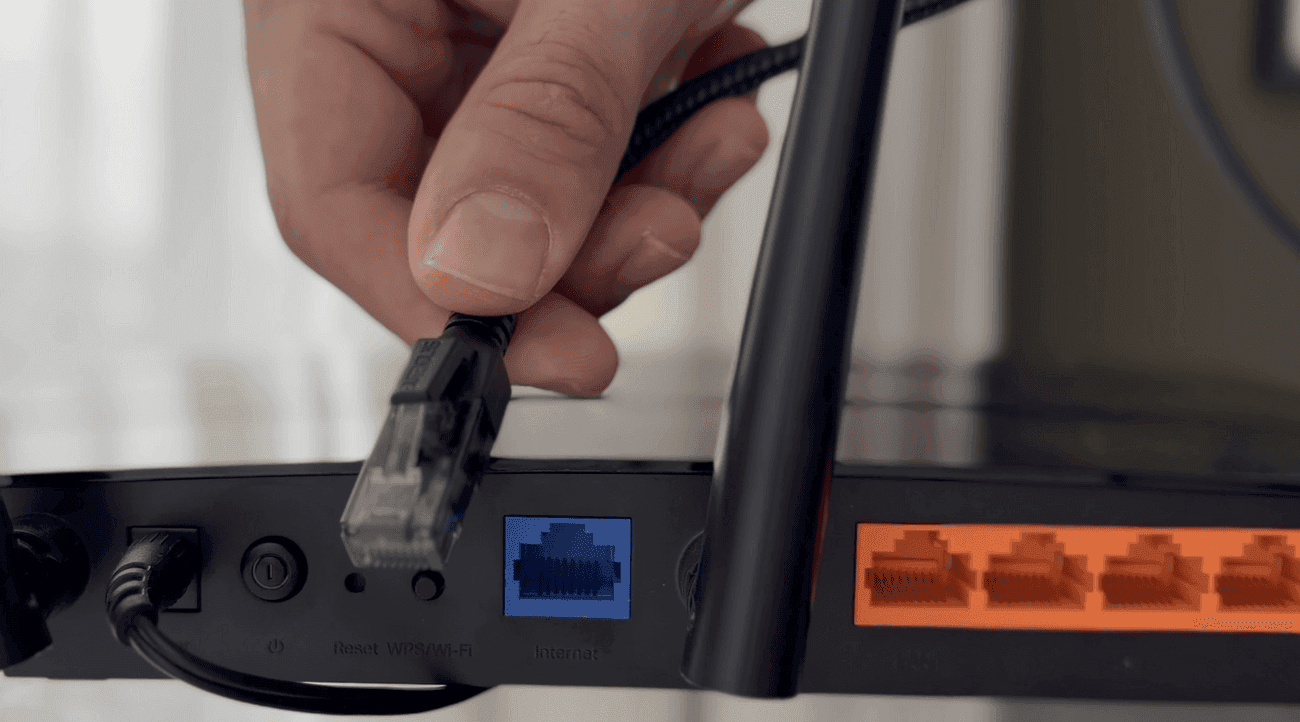
Step 2 — Plug in the power
Connect the power supply to PuriFi and to a wall outlet. PuriFi starts on its own. Here is what you should see, and when:
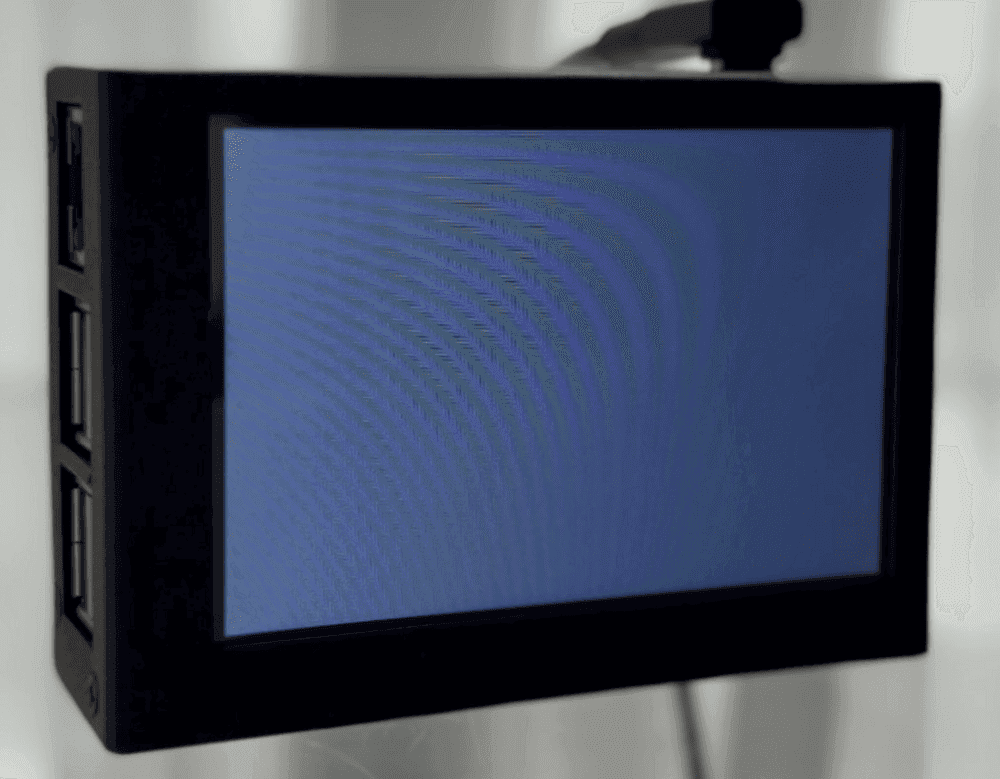
Straight away, for about 3 seconds
- On the screen
- The screen lights up bright and blank
Then
- On the screen
- Black, for a few seconds
Within about 20 seconds
- On the screen
- The word PuriFi in cyan
Between 60 and 90 seconds
- On the screen
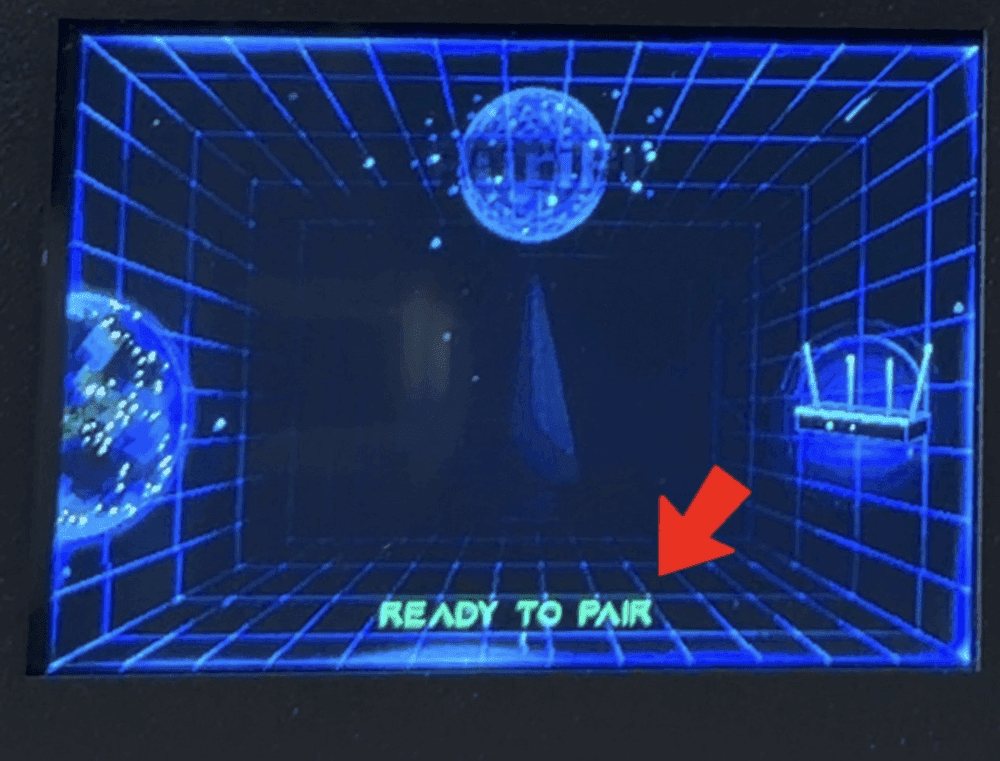
- The full animation, with a pulsing green READY TO PAIR along the bottom

Step 3 — Pair with the app
- Open the PuriFi app and create your account. You can use an email address and password, sign in with Google, or on an iPhone sign in with Apple.
- If you used an email address and password, check your email and click the link to confirm your address — the app will notice on its own and move you along. Signing in with Google or Apple skips this step.
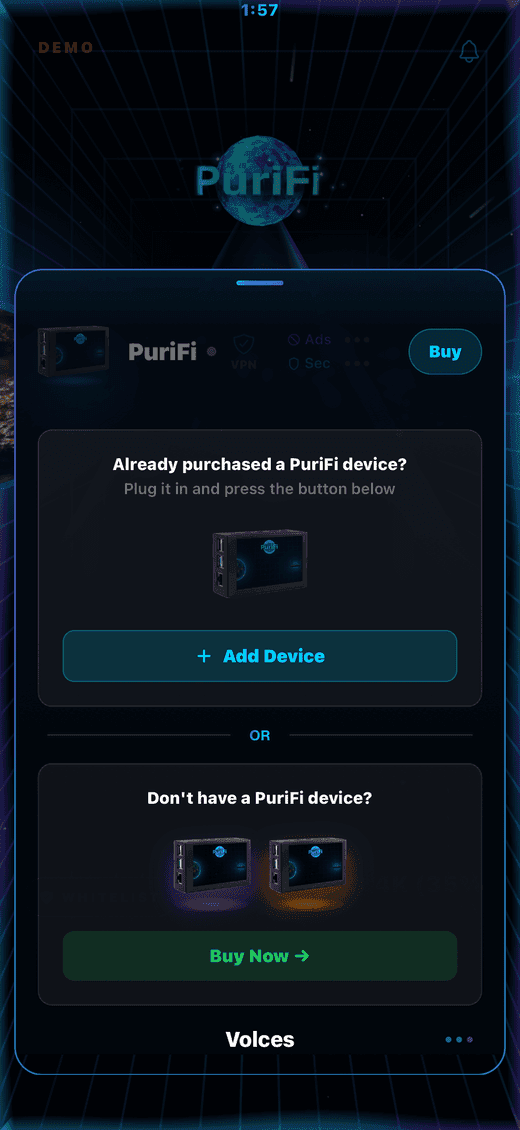
- On the main screen, drag the panel at the bottom upwards, then tap Add Device.
- Allow Bluetooth when your phone asks. PuriFi is set up over Bluetooth, so stay near the device.
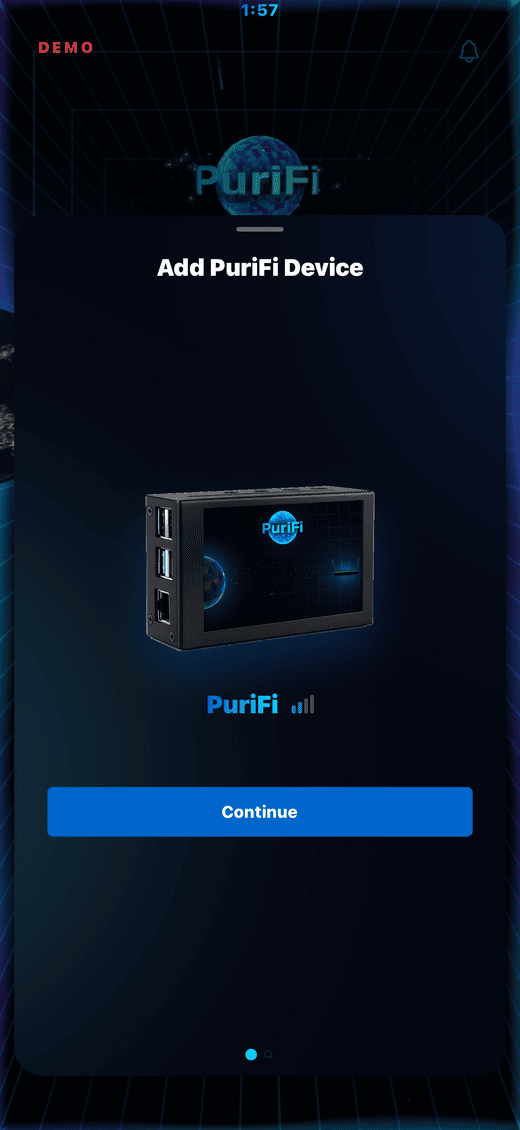
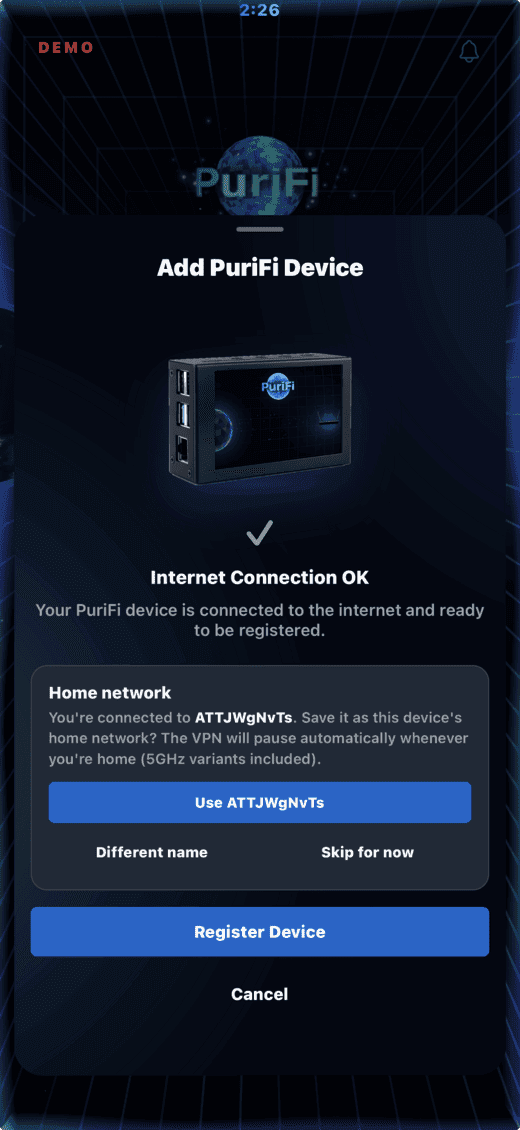
- Your PuriFi appears in a list, named PuriFi followed by a short code. Tap Continue.
- The app checks the device’s internet connection and shows Internet Connection OK.
- If the app offers to remember your home Wi-Fi name, say yes. This lets Private VPN pause itself automatically when you are at home. You can skip it and set it later.
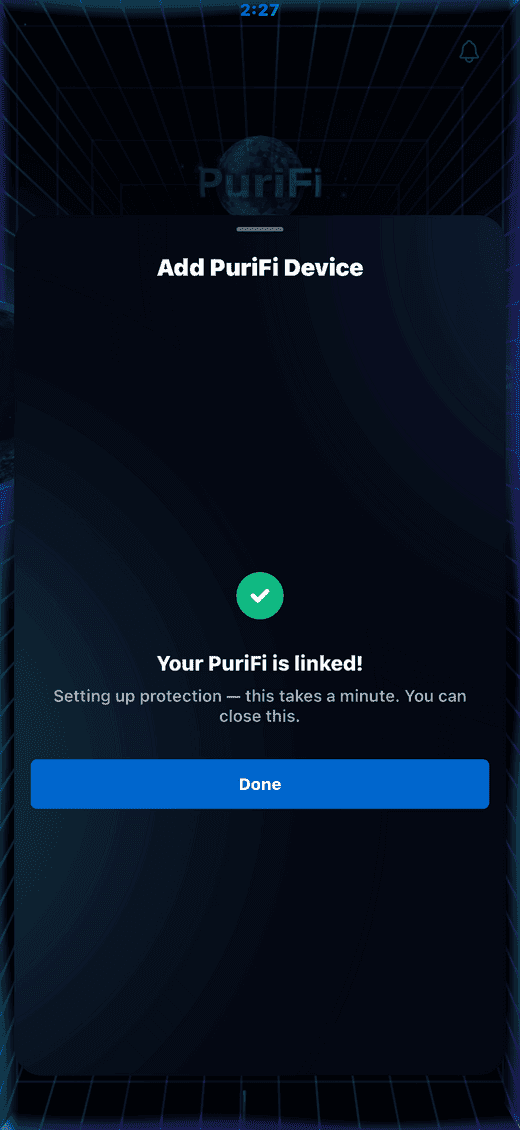
- Tap Register Device and wait. You will see it work through Registering your device… and then Your PuriFi is linked!
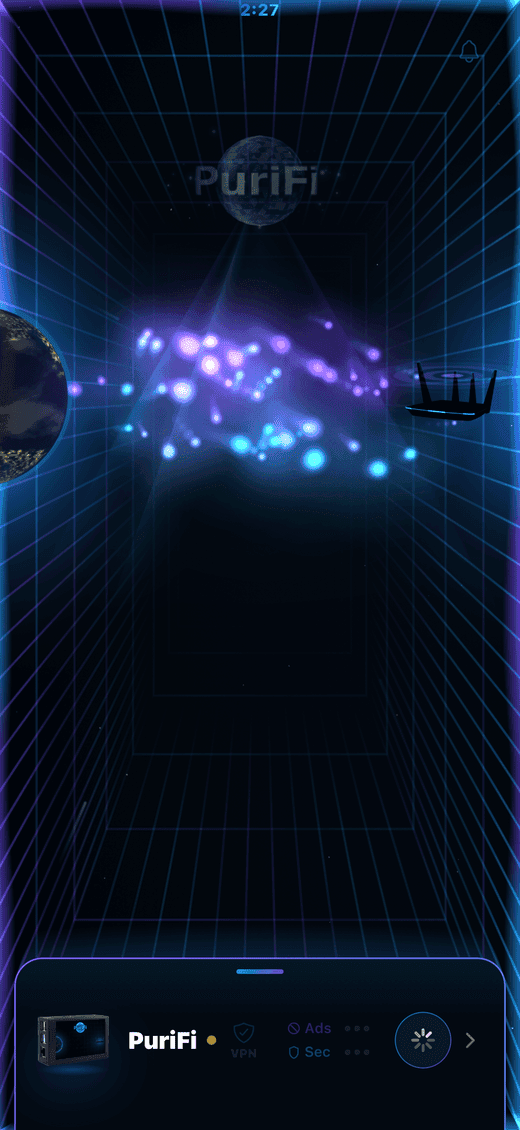
- Tap Done. Protection takes about another minute to arm itself. You can close the app — it finishes on its own.
How you know it worked
Registration usually takes under a minute. On some routers the secure connection can take up to three minutes to establish the first time — this is normal and needs no action from you. Keep your phone near the device while it works.
Two things you will notice
Worth ten minutes: access point mode
PuriFi and your router are both handing out addresses. That is what puts your home behind two layers of address translation, and why PuriFi sees your household as one device rather than as your phones, TVs and consoles. Handing both jobs to PuriFi fixes both. This is the optimal way of using PuriFi.
- In your router’s settings find Operation Mode — usually under Advanced or System — and choose Access Point. Router makers all call it something slightly different; look for Bridge Mode, AP Mode or Access Point Mode.
- Keep the same Wi-Fi name and password so your devices reconnect on their own.
- Move PuriFi’s cable out of the router’s Internet port into one of its numbered LAN ports: in access point mode the Internet port is unused.
Per-device profiles then work for everything in the house, not just phones.
Or: let PuriFi join your Wi-Fi as well
If you would rather not touch your router’s mode at all, there is a second way to get per-device rules. Leave both cables exactly as they are and let PuriFi also join your home Wi-Fi, the way a laptop would. From there it can see what else is on the network. The app calls this Wi-Fi discovery.
- In the device’s settings open HOUSEHOLD. Under WI-FI DISCOVERY there is a card, See every device on your Wi-Fi. Tap it.
- That takes you to Network, where you tap Connect to your Wi-Fi. This happens over Bluetooth, so stand next to the device.
- Pick your network and enter the password. Joining is the whole opt-in — nothing switches on by itself.
- HOUSEHOLD fills in with names, makers and addresses instead of one line saying router. If names are all you wanted, stop here.
- To give each device its own rules as well, point your router’s DNS at PuriFi. The address is in Network under DNS SERVER, labelled PuriFi address, and ends in .53.
This gets you per-device profiles and a real list of your devices without demoting your router or moving a cable. Two things it does not do: it does not remove the double NAT — only access point mode does that — and rules land at the lookup layer rather than instantly, so a device already holding an answer keeps it for a moment.
It is about names, not traffic: PuriFi reads name, address and maker only, never traffic or history. It is reversible from HOUSEHOLD → Turn off Wi-Fi discovery.
Wired sidecar
- For modem-routers
- Networks over 1 Gbps
- Requires config
- Pros
- No double NAT, per-device configurations
- Cons
- One router setting to change; devices with their own DNS slip past
The router setting is a one-off. The devices that bring their own DNS are the real limit here — nothing routes through PuriFi in this mode, so only inline catches those.
Set this up
If you would rather not put PuriFi between your modem and your router, there is a second way to run it. PuriFi hangs off one of your router’s LAN ports and acts purely as your home’s name-lookup server. Your traffic no longer flows through it — your router simply asks PuriFi to look addresses up.
In the app this is Sidecar Mode, and the owner’s manual also calls it DNS server mode.
This mode uses one cable — the plain Ethernet cable from the box. The USB-to-Ethernet cable is not used at all.
Step 1 — Connect the cable
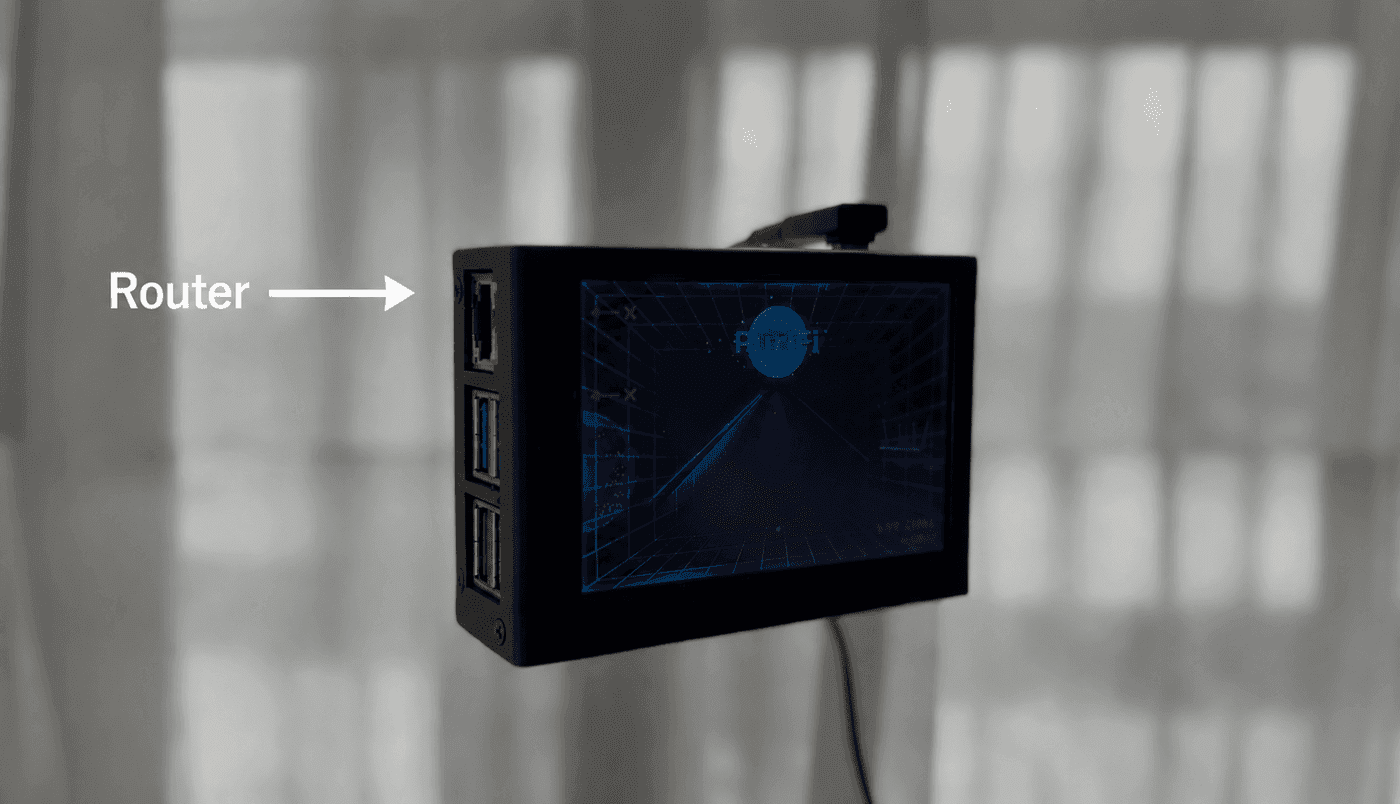
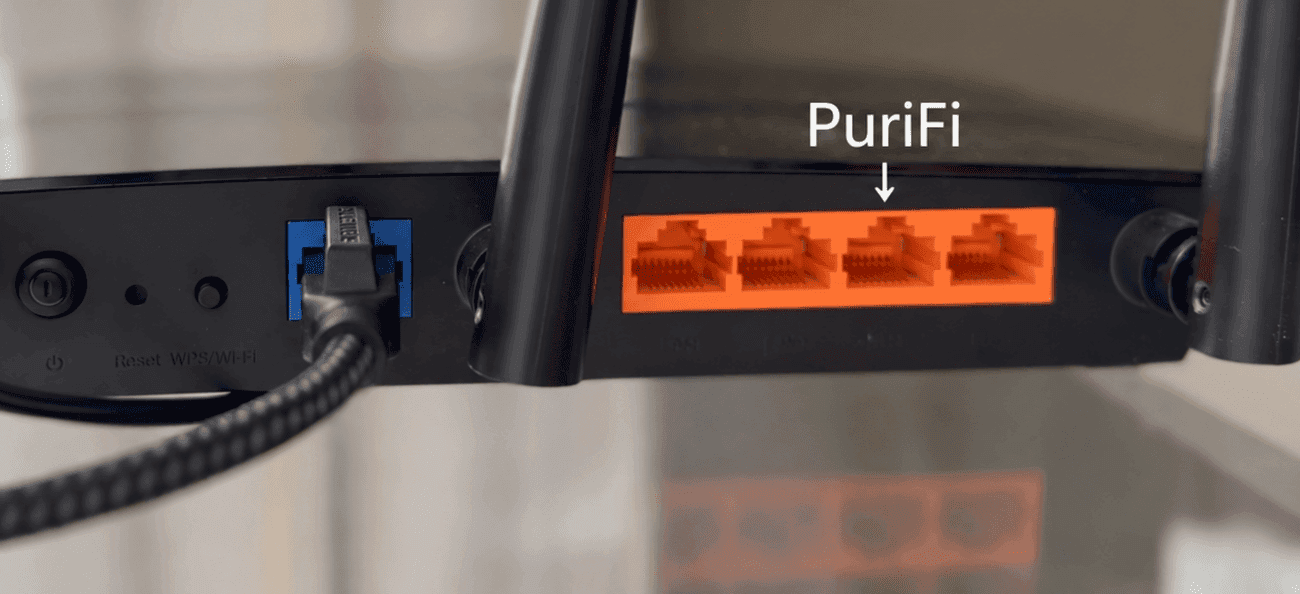
- Take the Ethernet cable from the box. Use the right-angled end at the device.
- Plug it into PuriFi’s built-in Ethernet port.
- Plug the other end into any LAN port on your router — one of the numbered ones. Leave the Internet port alone; your modem stays plugged into it.
Step 2 — Power up and pair
Plug in the power and pair with the app exactly as in the standard setup. Setup, pairing and filtering all behave the same way here.
Step 3 — Find PuriFi’s address
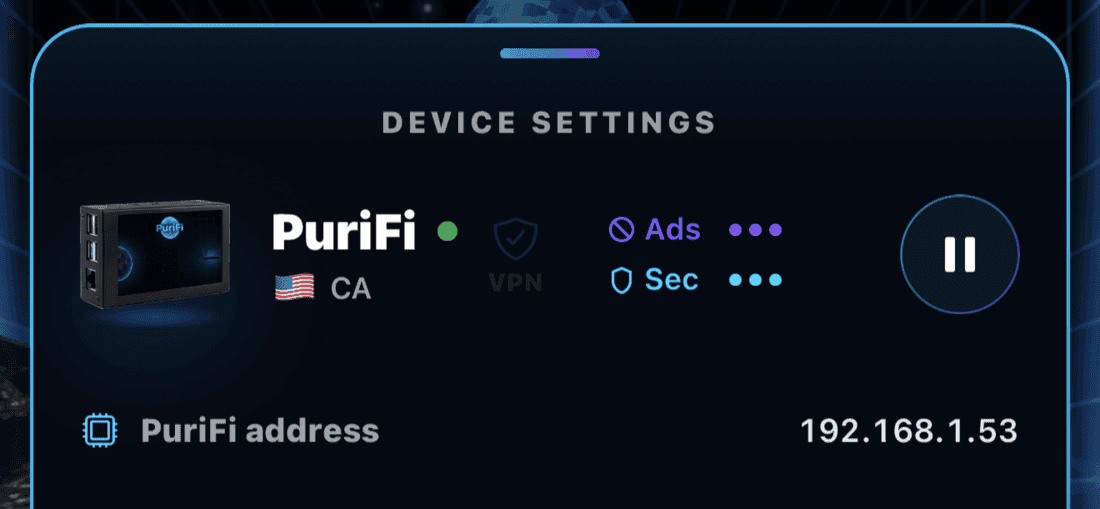
You do not have to work this out yourself. Open Network in the device’s settings and it is there under DNS SERVER, labelled PuriFi address. It also appears at the end of pairing, and any time afterwards at the top of DEVICE SETTINGS for that device.
Step 4 — Point your router at it
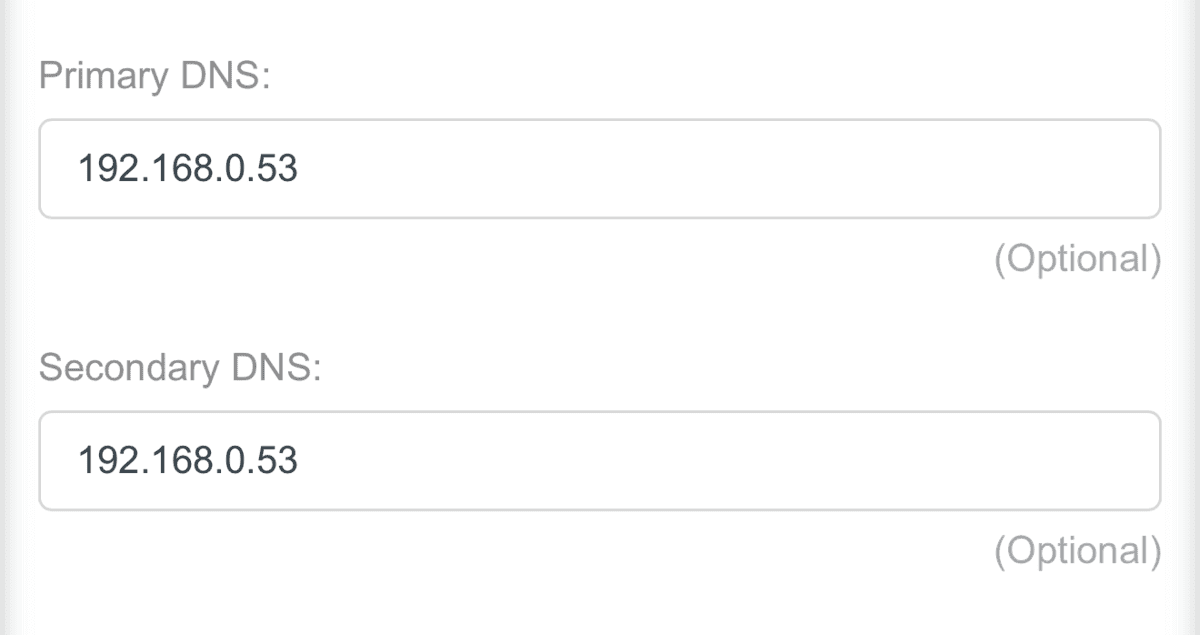
- In your router’s settings, find the DNS server fields. They are usually under LAN, DHCP, or Internet, and there are normally two of them.
- Set both the primary and the secondary to PuriFi’s address.
- Save the settings, then restart your devices or wait for them to pick up the change on their own. Most do within a day; restarting is faster.
One red arrow is normal here
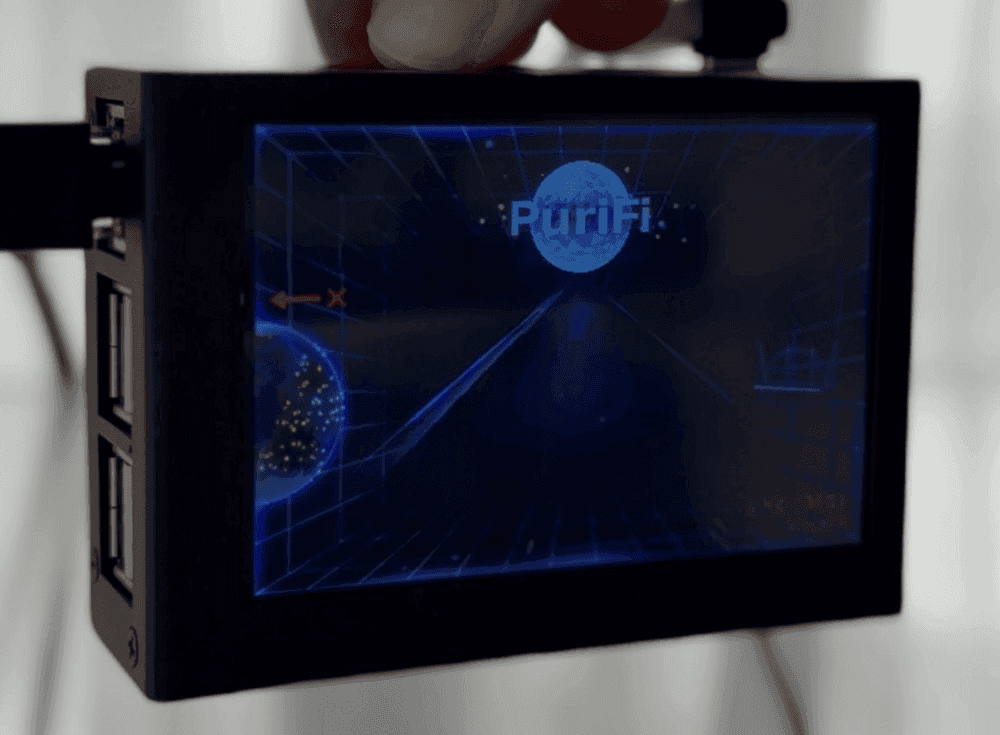
Because the USB-to-Ethernet cable is not used in this mode, PuriFi shows a red arrow and a blinking red X for that unused connection, permanently. That is expected — it is the device telling you a port has nothing plugged into it, not a fault. If you see two red arrows, the cable to your router has come out.
What is different in this mode
Better: no second layer of address translation, so Plex, remote play, port forwarding and game servers behave as they did before. PuriFi also sits on the same network as everything else, so it can tell your devices apart — per-device profiles work for televisions and consoles, not just phones.
Worse: coverage depends on your router passing PuriFi’s address to your devices. Anything with a name-lookup server built into it — some smart TVs, streaming sticks and IoT gadgets — ignores your router and slips past. Inline, those are caught anyway.
Wireless sidecar
- Put it anywhere
- Slower VPN
- Requires config
- Pros
- No cable to PuriFi, no double NAT, per-device configurations
- Cons
- Slower Private VPN; devices with their own DNS slip past
Both are recoverable: a cable from PuriFi to a spare LAN port makes this the wired sidecar and restores full tunnel speed, and inline catches the stubborn devices.
Set this up
PuriFi does not have to be wired at all. If you leave its Ethernet port empty, it can join your home Wi-Fi like any other device and serve filtered lookups over that instead. Everything in the wired sidecar section applies unchanged — it still takes an address, and you still point your router at it.
This is the same mode as above — the app’s switch says Sidecar Mode for both, and the manual also calls it DNS server mode. There is no separate button for the wireless version: the app offers Wi-Fi during setup when it sees the Ethernet port is empty. Once it is running, the app’s Mode row reads Wireless sidecar.
Step 1 — Power up with the Ethernet port empty
Plug in the power and leave the Ethernet port free. Pair with the app as usual; your phone talks to PuriFi over Bluetooth while it does, so this works before PuriFi has any internet of its own.
Step 2 — Join your Wi-Fi
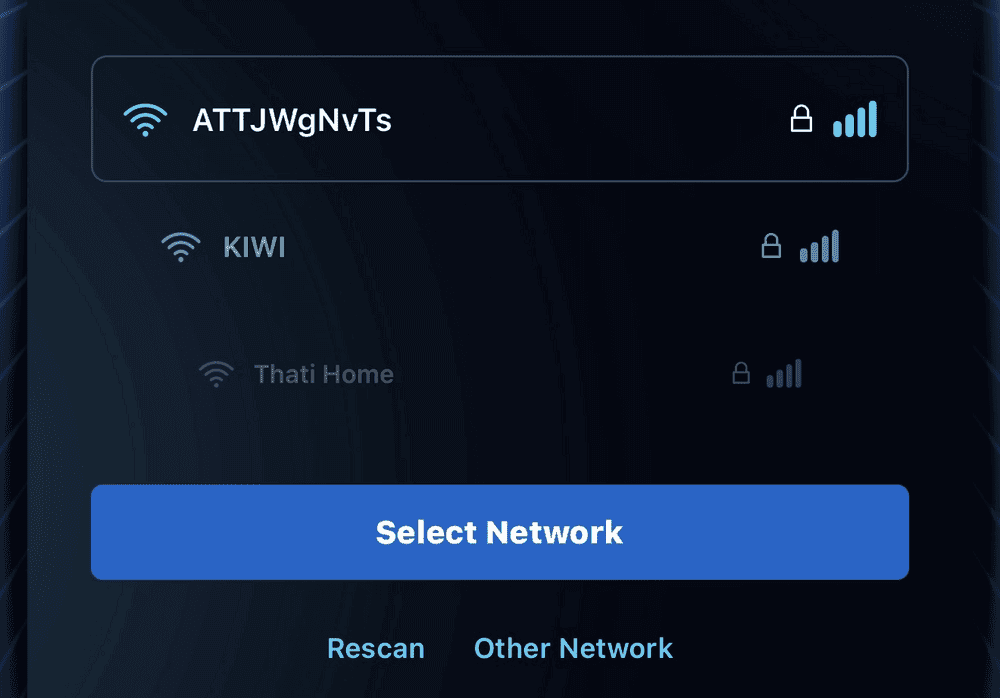
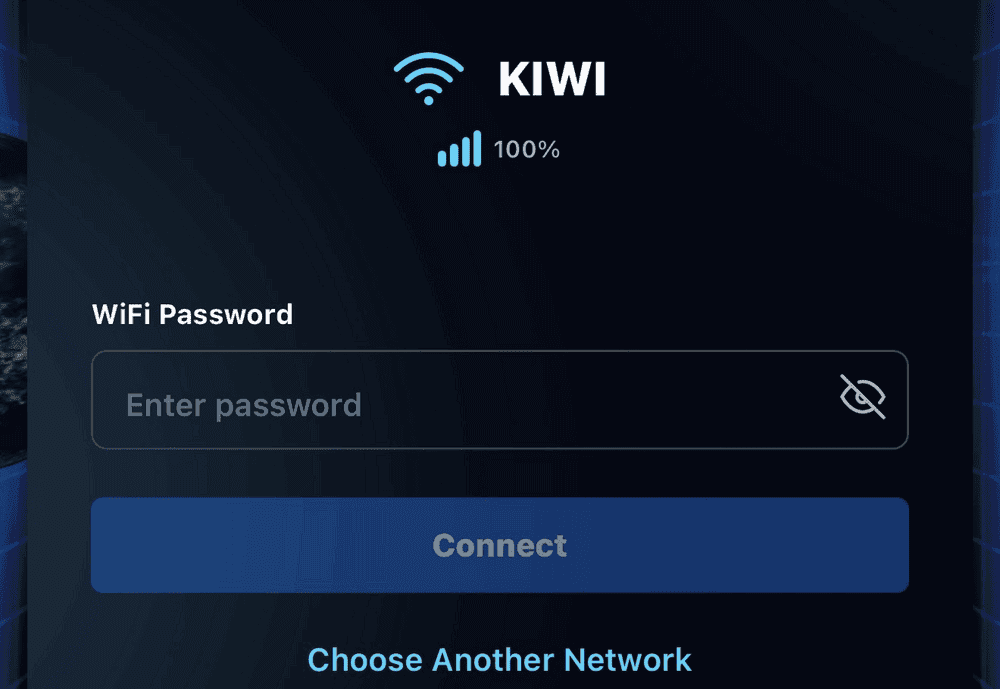
- Choose your network from the ones PuriFi can see.
- Enter the password and tap Connect.
Joining can take up to a minute
Step 3 — Point your router at it
Exactly as in the wired sidecar: find the address in DEVICE SETTINGS and put it in both of your router’s DNS fields.
Changing the network later
In Network, tap Change Wi-Fi network. Your phone finds the device over Bluetooth, you pick the new network — the one it is on now is named at the top — and it joins. This can take up to a minute.
If you ever swap routers, PuriFi takes a new address on the new network. Open DEVICE SETTINGS again at that point and update your router to match.
While you set up
Reading the screen
The screen on the front is not decorative — it tells you what PuriFi is doing at a glance, and it is the fastest way to diagnose a problem. Learning these three-second checks will save you almost every support call.
Bright and blank
- What it means
- Powering up
- What to do
- Wait. It lasts about 3 seconds.
The word PuriFi in cyan on black
- What it means
- Starting up
- What to do
- Wait. About 20 seconds in.
The animation, with a pulsing green READY TO PAIR
- What it means
- Running, but not yet linked to an account
- What to do
- Open the app and tap Add Device
The full-brightness animation, with a count in the bottom-right corner
- What it means
- Working normally and protecting your home
- What to do
- Nothing
The whole picture dimmed, with red dots reaching the router
- What it means
- Filtering is off. Your internet works, but nothing is being blocked
- What to do
- Usually temporary — see the manual’s troubleshooting section
A red arrow and a blinking red X
- What it means
- A network connection is unplugged, or the USB adapter is not working. In sidecar mode, one arrow is normal
- What to do
- Check both cables


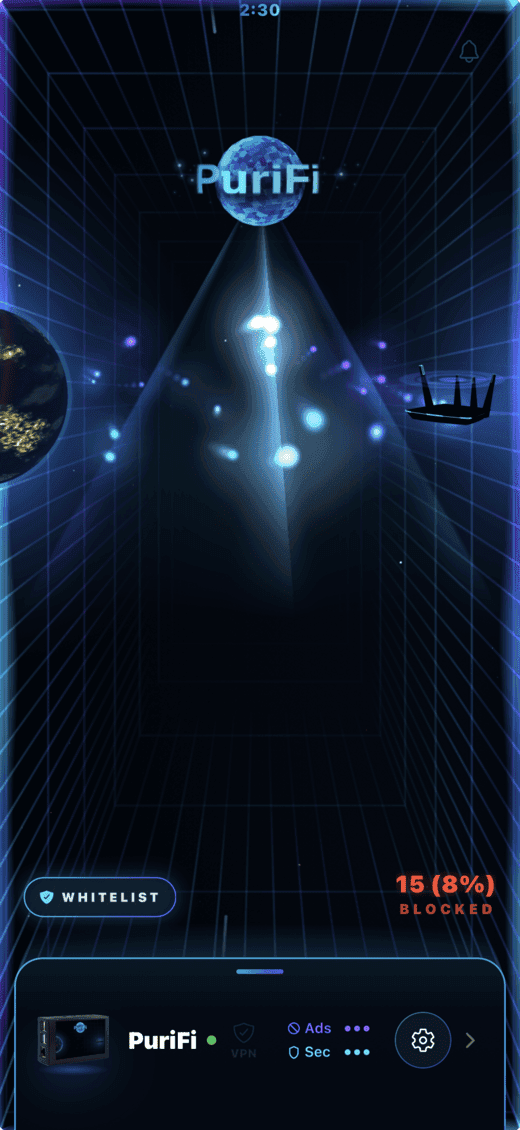
The earth on the left is the internet, the router on the right is your home, and the ball in the middle is PuriFi, catching what should not get through. The number in the bottom-right corner is how many requests PuriFi has blocked today, followed by what share of all traffic that represents. When PuriFi blocks something, the name of the company behind it appears briefly along the bottom with the reason underneath.
Give the screen a day to settle
Changing your mind later
You do not have to pair again to change your mind. Open Network in the device’s settings: under SETUP there are two rows, Inline Mode and Sidecar Mode, with a check on the one you are running. Tap the other one and PuriFi walks you through it. It takes about a minute, and your router’s address for PuriFi stays the same when PuriFi is on your Wi-Fi.
The order matters, and it is different in each direction.
To inline — wire first, then tap
Plug the modem into PuriFi’s built-in Ethernet port and the USB-to-Ethernet cable into your router’s Internet port, exactly as in the standard setup. Then tap Inline Mode. PuriFi checks the wiring before it changes anything: if the USB adapter is missing, the modem is not on its Ethernet port, or the adapter’s cable is on a LAN port instead of Internet, it tells you and leaves everything as it was.
To a sidecar — tap first, then wire
Tap Sidecar Mode while PuriFi is still wired inline; once the modem cable is moved, the app cannot reach it. Then move the modem cable back to your router’s Internet port and plug PuriFi’s Ethernet cable into any LAN port — or leave it on your Wi-Fi. Your home is offline between the tap and the re-wire, about a minute. Until you re-wire, Mode still says Inline; the note under SETUP reminds you what to move.
This ordering applies only to switching a device that is already paired. Setting one up for the first time is always wired first.
Everything else
The owner’s manual
This page covers getting connected. The manual covers the rest: profiles and per-device rules, Private VPN, sharing with your household, content controls, alerts, troubleshooting, care and safety, specifications, the warranty, and your privacy.
PuriFi Owner’s Manual
79 pages · 8.8 MB · English
The complete manual — the same one the QR code inside your box lid points at. It is updated as the product changes, so the copy you reach here is always the current one. Worth a bookmark.
If something is not right
The manual’s troubleshooting section covers the screen never reaching READY TO PAIR, the app not finding your device, red arrows, and websites that stop working. If none of it helps, write to us.
- support@purifi.io — a real person answers. We aim to reply within three business days, and usually much sooner.
- Frequently asked questions — answers to the questions we are asked most.
- Privacy policy
It saves a round trip if your first email has your device name as shown in the app, your order number, what the screen is showing — a photograph is ideal — and what you were doing when the problem started.